# Table Of Contents
# SQLite
SQLite는 관계형 데이터베이스 입니다. 크기가 작고 가벼워 안드로이드나 애플 iOS처럼 모바일용 데이터베이스로 많이 사용합니다.
SQLite는 안드로이드 SDK에 포함되어있습니다. 따라서 별도의 설치가 필요없습니다.
$ pwd
/Users/[user_name]/Library/Android/sdk/platform-tools

$ ls
sqlite3
...
# 사용 방법
상품을 데이터베이스에 저장하는 예제를 만들어보겠습니다.
# 데이터 모델 설계하기
우선 데이터 모델인 Product클래스를 정의합니다. Product클래스는 상품을 식별하는 _id, 상품 이름인 _productName, 수량인 _quantity를 속성으로 가지고 있습니다.
data class Product(
    var _id: Int = 0,
    var _productName: String,
    var _quantity: Int
)
# 데이터 핸들러 구현하기
데이터 핸들러는 데이터의 추가, 삭제, 변경, 조회를 담당하는 클래스입니다. SQLiteOpenHelper클래스의 서브 클래스로 구현됩니다.
class DBHelper constructor(
    // ..
): SQLiteOpenHelper(
    // ..
) {
    override fun onCreate(db: SQLiteDatabase?) {
        TODO("Not yet implemented")
    }

    override fun onUpgrade(db: SQLiteDatabase?, oldVersion: Int, newVersion: Int) {
        TODO("Not yet implemented")
    }

}
데이터베이스 이름, 데이터베이스 버전, 테이블 이름, 컬럼 이름을 선언합니다.
class DBHelper constructor(
    // ..
): SQLiteOpenHelper(
    // ..
) {
    companion object {
        const val DATABASE_NAME = "productDB.db"
        const val DATABASE_VERSION = 1
        const val TABLE_PRODUCTS = "products"

        const val COLUMN_ID = "id"
        const val COLUMN_PRODUCT_NAME = "product_name"
        const val COLUMN_QUANTITY = "quantity"
    }

    // ...
}
이제 생성자를 다음과 같이 구현합니다.
class DBHelper constructor(
    context: Context, name: String?, factory: SQLiteDatabase.CursorFactory?, version: Int
) : SQLiteOpenHelper(
    context, DATABASE_NAME, factory, DATABASE_VERSION
) {

    companion object {
        const val DATABASE_NAME = "productDB.db"
        const val DATABASE_VERSION = 1
        const val TABLE_PRODUCTS = "products"

        const val COLUMN_ID = "id"
        const val COLUMN_PRODUCT_NAME = "product_name"
        const val COLUMN_QUANTITY = "quantity"
    }

    // ...
}
onCreate()는 데이터베이스가 최초로 초기화될 때 호출됩니다. 여기서 product 테이블을 생성합시다.
class DBHelper constructor(
    context: Context, name: String, factory: SQLiteDatabase.CursorFactory, version: Int
) : SQLiteOpenHelper(
    context, DATABASE_NAME, factory, DATABASE_VERSION
) {
    // ...

    override fun onCreate(db: SQLiteDatabase?) {
        val query = "CREATE TABLE ${TABLE_PRODUCTS} " +
                "(" +
                "$COLUMN_ID INTEGER PRIMARY KEY, " +
                "$COLUMN_PRODUCT_NAME TEXT," +
                "$COLUMN_QUANTITY INTEGER" +
                ")"
        db?.execSQL(query)
    }

    // ...

}
이전에 사용된 것보다 더 높은 데이터베이스 버전을 가지고 핸들러가 실행될 때 onUpgrade()가 호출됩니다.
TIP
여기서 말하는 데이터베이스 버전은 SQLite의 버전이 아닙니다. 테이블의 열이 추가되거나 데이터베이스 스키마가 변경되었을 때 버전 번호를 올려서 핸들러를 실행하면 onUpgrade()가 자동으로 호출됩니다. 이 때 onUpgrade() 안에서 원하는 SQL 작업을 수행합니다.
class DBHelper constructor(
    context: Context, name: String, factory: SQLiteDatabase.CursorFactory, version: Int
) : SQLiteOpenHelper(
    context, DATABASE_NAME, factory, DATABASE_VERSION
) {
    // ...

    override fun onUpgrade(db: SQLiteDatabase?, oldVersion: Int, newVersion: Int) {
        val query = "DROP TABLE IF EXISTS ${TABLE_PRODUCTS}"
        db?.execSQL(query)
        onCreate(db)
    }
}
이제 데이터를 추가하는 메서드를 구현합시다. 메서드의 이름은 addProduct() 입니다.
class DBHelper constructor(
    context: Context, name: String, factory: SQLiteDatabase.CursorFactory, version: Int
) : SQLiteOpenHelper(
    context, DATABASE_NAME, factory, DATABASE_VERSION
) {
    // ...

    fun addProduct(product: Product) {
        val values = ContentValues()

        values.put(COLUMN_PRODUCT_NAME, product._productName)
        values.put(COLUMN_QUANTITY, product._quantity)

        var db = writableDatabase
        db.insert(TABLE_PRODUCTS, null, values)
        db.close()
    }
}
데이터를 검색하는 메서드는 findProduct()입니다.
class DBHelper constructor(
    context: Context, name: String, factory: SQLiteDatabase.CursorFactory, version: Int
) : SQLiteOpenHelper(
    context, DATABASE_NAME, factory, DATABASE_VERSION
) {
    // ...

    fun findProduct(productName: String): Product? {
        val query = "SELECT * FROM ${TABLE_PRODUCTS} WHERE ${COLUMN_PRODUCT_NAME} = \"${productName}\""

        val db = writableDatabase
        val cursor = db.rawQuery(query, null)

        var product: Product? = null

        if (cursor.moveToFirst()) {
           product = Product(
               _id = Integer.parseInt(cursor.getString(0)),
               _productName = cursor.getString(1),
               _quantity =  Integer.parseInt(cursor.getString(2))
           )
            cursor.close()
        } else {
            product = null
        }

        db.close()
        return product
    }
}
데이터를 삭제하는 메서드는 deleteProduct()입니다.
class DBHelper constructor(
    context: Context, name: String?, factory: SQLiteDatabase.CursorFactory?, version: Int
) : SQLiteOpenHelper(
    context, DATABASE_NAME, factory, DATABASE_VERSION
) {
    fun deleteProduct(productName: String): Boolean {
        var result = false

        val query = "SELECT * FROM ${TABLE_PRODUCTS} WHERE ${COLUMN_PRODUCT_NAME} = \"${productName}\""

        val db = writableDatabase

        var cursor = db.rawQuery(query, null)

        if (cursor.moveToFirst()) {
            val productId = Integer.parseInt(cursor.getString(0))
            db.delete(TABLE_PRODUCTS, "$COLUMN_ID = ${productId}", null)
            cursor.close()
            result = true
        }

        db.close()
        return result
    }
}
전체 코드는 다음과 같습니다.
class DBHelper constructor(
    context: Context, name: String?, factory: SQLiteDatabase.CursorFactory?, version: Int
) : SQLiteOpenHelper(
    context, DATABASE_NAME, factory, DATABASE_VERSION
) {

    companion object {
        const val DATABASE_NAME = "productDB.db"
        const val DATABASE_VERSION = 1
        const val TABLE_PRODUCTS = "products"

        const val COLUMN_ID = "id"
        const val COLUMN_PRODUCT_NAME = "product_name"
        const val COLUMN_QUANTITY = "quantity"
    }

    override fun onCreate(db: SQLiteDatabase?) {
        val query = "CREATE TABLE ${TABLE_PRODUCTS} " +
                "(" +
                "$COLUMN_ID INTEGER PRIMARY KEY, " +
                "$COLUMN_PRODUCT_NAME TEXT," +
                "$COLUMN_QUANTITY INTEGER" +
                ")"
        db?.execSQL(query)
    }

    override fun onUpgrade(db: SQLiteDatabase?, oldVersion: Int, newVersion: Int) {
        val query = "DROP TABLE IF EXISTS ${TABLE_PRODUCTS}"
        db?.execSQL(query)
        onCreate(db)
    }

    fun addProduct(product: Product) {
        val values = ContentValues()

        values.put(COLUMN_PRODUCT_NAME, product._productName)
        values.put(COLUMN_QUANTITY, product._quantity)

        var db = writableDatabase
        db.insert(TABLE_PRODUCTS, null, values)
        db.close()
    }

    fun findProduct(productName: String): Product? {
        val query = "SELECT * FROM ${TABLE_PRODUCTS} WHERE ${COLUMN_PRODUCT_NAME} = \"${productName}\""

        val db = writableDatabase
        val cursor = db.rawQuery(query, null)

        var product: Product? = null

        if (cursor.moveToFirst()) {
           product = Product(
               _id = Integer.parseInt(cursor.getString(0)),
               _productName = cursor.getString(1),
               _quantity =  Integer.parseInt(cursor.getString(2))
           )
            cursor.close()
        } else {
            product = null
        }

        db.close()
        return product
    }

    fun deleteProduct(productName: String): Boolean {
        var result = false

        val query = "SELECT * FROM ${TABLE_PRODUCTS} WHERE ${COLUMN_PRODUCT_NAME} = \"${productName}\""

        val db = writableDatabase

        var cursor = db.rawQuery(query, null)

        if (cursor.moveToFirst()) {
            val productId = Integer.parseInt(cursor.getString(0))
            Log.d("TEST", "productId: ${productId}")
            db.delete(TABLE_PRODUCTS, "$COLUMN_ID = ${productId}", null)
            cursor.close()
            result = true
        }

        db.close()
        return result
    }
}
이제 MainActivity에서 버튼을 누르면 추가, 검색, 삭제를 하겠습니다.
레이아웃은 다음과 같습니다
<?xml version="1.0" encoding="utf-8"?>
<androidx.constraintlayout.widget.ConstraintLayout xmlns:android="http://schemas.android.com/apk/res/android"
    xmlns:app="http://schemas.android.com/apk/res-auto"
    xmlns:tools="http://schemas.android.com/tools"
    android:layout_width="match_parent"
    android:layout_height="match_parent"
    tools:context=".MainActivity">

    <LinearLayout
        android:padding="36dp"
        android:id="@+id/activity_main_ll_top"
        android:layout_width="match_parent"
        android:layout_height="wrap_content"
        android:orientation="vertical"
        app:layout_constraintTop_toTopOf="parent"
        app:layout_constraintStart_toStartOf="parent"
        app:layout_constraintEnd_toEndOf="parent"
        app:layout_constraintBottom_toBottomOf="parent">

        <EditText
            android:id="@+id/activity_main_tv_product_name"
            android:layout_width="match_parent"
            android:layout_height="wrap_content"
            android:hint="Product Name"/>

        <EditText
            android:id="@+id/activity_main_tv_quantity"
            android:layout_width="match_parent"
            android:layout_height="wrap_content"
            android:hint="Quantity"/>

        <Button
            android:id="@+id/activity_main_btn_add"
            android:layout_width="match_parent"
            android:layout_height="wrap_content"
            android:text="Add" />

        <Button
            android:id="@+id/activity_main_btn_find"
            android:layout_width="match_parent"
            android:layout_height="wrap_content"
            android:text="Find" />

        <Button
            android:id="@+id/activity_main_btn_remove"
            android:layout_width="match_parent"
            android:layout_height="wrap_content"
            android:text="Remove" />

    </LinearLayout>

</androidx.constraintlayout.widget.ConstraintLayout>
코드는 다음과 같습니다.
class MainActivity : AppCompatActivity() {

    val buttonAdd: Button by lazy { findViewById<Button>(R.id.activity_main_btn_add) }
    val buttonFind: Button by lazy { findViewById<Button>(R.id.activity_main_btn_find) }
    val buttonRemove: Button by lazy { findViewById<Button>(R.id.activity_main_btn_remove) }

    val editTextProductName: EditText by lazy { findViewById<EditText>(R.id.activity_main_tv_product_name) }
    val editTextQuantity: EditText by lazy { findViewById<EditText>(R.id.activity_main_tv_quantity) }

    override fun onCreate(savedInstanceState: Bundle?) {
        super.onCreate(savedInstanceState)
        setContentView(R.layout.activity_main)

        buttonAdd.setOnClickListener {
            val dbHelper = DBHelper(this, null, null, 1)
            var productName = editTextProductName.text.toString()
            val quantity = Integer.parseInt(editTextQuantity.text.toString())
            val product = Product(_productName = productName, _quantity = quantity)
            dbHelper.addProduct(product)
            Toast.makeText(this, "Added.", Toast.LENGTH_SHORT).show()
        }
        buttonFind.setOnClickListener {
            val dbHelper = DBHelper(this, null, null, 1)
            var productName = editTextProductName.text.toString()
            val product = dbHelper.findProduct(productName)
            if (product != null) {
                Toast.makeText(this, "${product.toString()}", Toast.LENGTH_SHORT).show()
            } else {
                Toast.makeText(this, "No Such Item.", Toast.LENGTH_SHORT).show()
            }

        }
        buttonRemove.setOnClickListener {
            val dbHelper = DBHelper(this, null, null, 1)
            var result = dbHelper.deleteProduct("iPhone")
            if (result) {
                Toast.makeText(this, "Deleted.", Toast.LENGTH_SHORT).show()
            } else {
                Toast.makeText(this, "Not Deleted. No Such Item.", Toast.LENGTH_SHORT).show()
            }
        }
    }
}
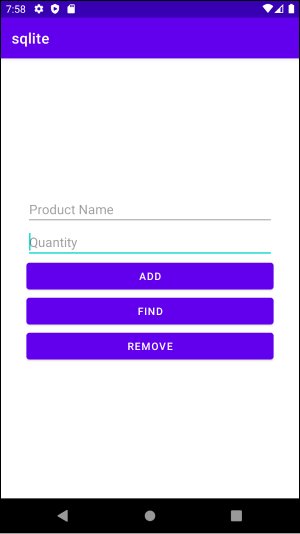
이제 앱을 실행하고 상품명과 수량을 입력합니다.

Find 버튼을 누르면 다음과 같은 토스트 메시지가 나옵니다. 아직 추가된 데이터가 없기 때문입니다.

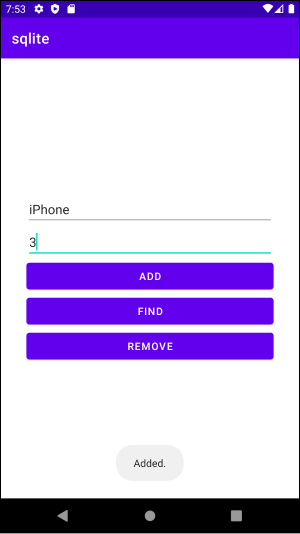
이제 ADD 버튼을 눌러 데이터를 추가합니다. 데이터가 정상적으로 추가되면 다음과 같이 토스트 메시지가 나옵니다.
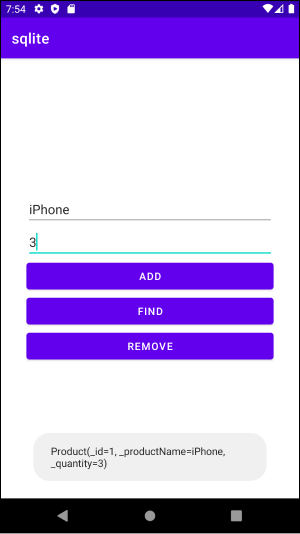
다시 Find 버튼을 눌러봅니다. 입력한 데이터가 토스트 메시지에 출력됩니다.
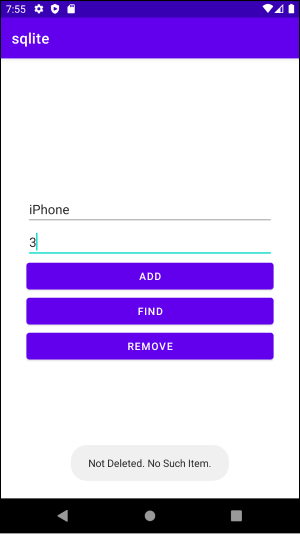
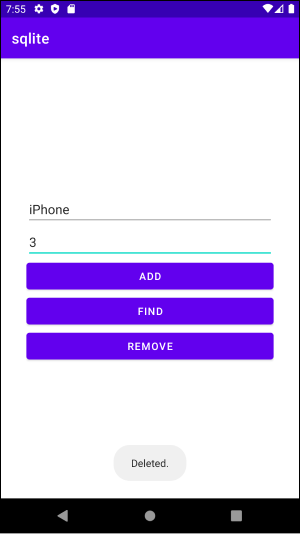
이제 REMOVE 버튼을 누릅니다. 데이터가 삭제되고 다음과 같은 메시지가 출력됩니다.
다시 한번 REMOVE 버튼을 누릅니다. 데이터가 이미 삭제됐으므로 다음과 같은 메시지가 출력됩니다.